Transaction Categories Interface and Tutorials
Before transactions can be captured, these steps must be completed:
- Create a Transaction Type for every transaction needed (e.g. Customer Invoices, Credit Notes, General Journal, Bank Payments) and complete the additional tabs:
- Choose the Settings.
- Create Statuses.
- Create Categories (optional): explained below.
- Create rules for copying the transactions and set user access for those rules (referred to as Copy Rules).
- Create or import forms (e.g. Invoices) that are applicable to the transactions (known as Output Templates).
- Set User Access for the Transaction Type.
- Add the Transaction Type to a Menu.
Organisations may create as many Transaction Types as they want.
Navigation: Main Menu > Setup > Transaction Types > Right click to edit any Transaction Type > Categories (tab)
- Users can create Categories for reporting and filtering purposes.
- Categories can be created for Items and for Transactions.
Categories (tab)
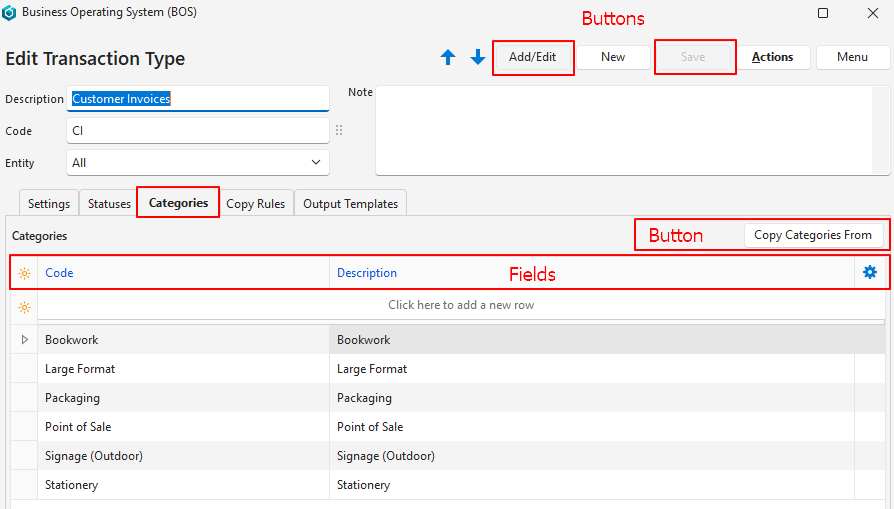
Buttons Explained
| Button | Description |
|---|---|
| ↑ ↓ | Navigates between Transaction Types (not categories). |
| Add/Edit | Allows users to edit the fields or add a category. |
| New | Creates a New Transaction Type (not category). |
| Save | Saves any changes (most changes are automatically saved). |
| Actions | Actions are not applicable to the Categories (tab). |
| Menu | Settings – User Access – Edit Accounting (VAT Types, Currencies, Credit Terms, Accounts) – Edit Proposal Templates Layout |
| Copy Categories From | Provides a dropdown list of transaction types that have categories. Replaces the current transaction type’s categories with those of the selected transaction type if confirmed. |
Fields Explained
| Entry | Description |
|---|---|
| Field Chooser (*) | Allows users to add or remove columns. |
| ID | A system-generated number for the category. |
| Code | A short description (Code) of the category. |
| Description | The category’s description. |
| Widget | A submenu that is used to Delete the category. |
Category Tutorials
How to Create a Category
- Navigate to Categories.
- Click Add/Edit (button).
- Click anywhere in the top row where it shows: Click here to add a new row.
- Fill in the details as follows:
- Code = Type an abbreviation for the Category.
- Description = Type a description for the Category.
- Click Save (button) or press Tab to automatically open a new row.
How to Edit Categories
- Navigate to Categories.
- Click Add/Edit (button).
- Click any field and edit the text.
- Click Save (button).
How to Copy Categories
This procedure replaces the existing categories with those from the selected transaction type.
- Navigate to Categories.
- Click Copy Categories From (button).
- Select a transaction type from the dropdown list of transaction types that have categories.
- Click Yes (button) on the popup to confirm you want to copy the categories.
- The changes are automatically saved.