Admin – Subscribers and Languages
Navigation: BOS Tools > Admin (BOS) > Right click a database
How to Add a Subscriber
- Open BOS Tools.
- Click Admin (BOS) (tile menu option).
- Click New (button).
- Fill in the information on the popup as follows:
- Name = Type a name for the subscriber.
- Sub Type = Select Standard or Premium from the dropdown list.
- Max Users = Type the maximum number of users that are allowed on the desktop app.
- Expiry = Type an expiry date for the trial version.
- Click Add Default User (button) to add a user (e.g. yourself) and complete the details on the poup as follows:
- Name = Type the name of the default user.
- Email = Type the email address of the default user.
- Click Done (button).
How to Edit a Subscriber
The available functions depend on your user access to BOS Tool features.
- Open BOS Tools.
- Click Admin (BOS) (tile menu option).
- Click Edit (button).
- Make any changes as needed (fields can be overtyped, or different options selected from the dropdown lists).
- Click Save (button).
- Changes can also be made by right clicking a subscriber and selecting an option from this context menu:
- View/Edit Users
- View/Edit Databases
- View/Edit Storage Info
- Assign Languages
- Suspend
- Max User Audits
- Login Audits
- Delete
How to Suspend a Subscriber
- Open BOS Tools.
- Click Admin (BOS) (tile menu option).
- Right click the applicable Subscriber and select Suspend from the context menu.
- Click Save (button).
- Note: The subscriber’s Status is changed to Disabled.
- Note: The applicable Users are sent an email notifying them of the suspension.
How to Add an Agent to a Subscriber
- An agent is the person who manages and supports the subscriber.
- The agent must be a subscriber (user) and authorised to use BOS Tools with the same email address being used to access BOS Desktop and BOS Tools.
- Agents must use their BOS Subscriber (user) passwords to log into BOS Desktop. A list of their databases will be displayed for selection.
- Open BOS Tools.
- Click Admin (BOS) (tile menu option).
- Click Edit (button).
- Click the dropdown list next to applicable subscriber in the Agent column and select a user.
- Click Save (button).
How to View / Edit Users
- Open BOS Tools.
- Click Admin (BOS) (tile menu option).
- Right click the applicable Subscriber and select View/Edit Users from the context menu.
How to View / Edit Databases
- Open BOS Tools.
- Click Admin (BOS) (tile menu option).
- Right click the applicable Subscriber and select View/Edit Databases from the context menu.
How to Assign Languages
When a language is added to a subscriber, check that the master dictionary is translated (see topic below).
- Open BOS Tools.
- Click Admin (BOS) (tile menu option).
- Right click the applicable Subscriber and select Assign Languages from the context menu.
- Add a language by clicking it in the Available section and moving it with the arrows to the Selected column.
- Remove a language by clicking it in the Selected section and moving it with the arrows to the Available column.
- Click OK (button).
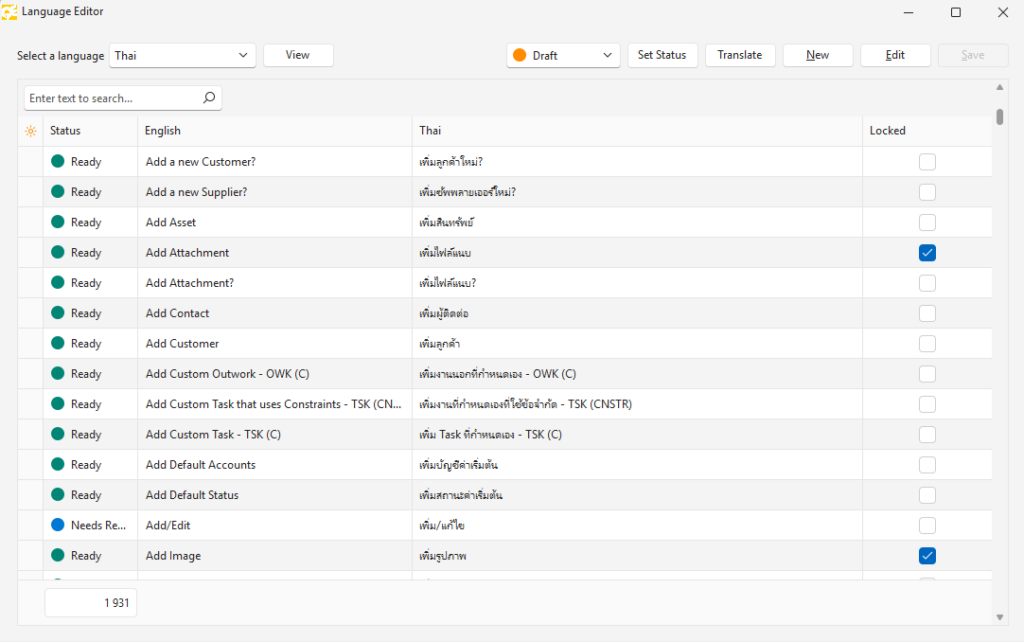
How to Translate the Master Dictionary
When translations are manually added, using the BOS Tools interface, they are locked which is indicated by a checkbox in the Locked column. When the database is refreshed to look for new or unused terms, the locked entries are not checked or removed.
- Open BOS Tools.
- Click Language Editor (tile menu option).
- Select the applicable language from the dropdown list next to Select a language.
- Click View (button).
- Select all the untranslated entries.
- Click Translate (button).
- If you speak the language, check and edit the text where necessary.
- Select all the entries again.
- Select an applicable status from the dropdown list.
- Click Set Status (button).
Learn More
- Admin – BOS Tools Upgrade Notes: Upgrade notes for BOS Tools.
- Admin – Currencies: Activating currencies in BOS Tools.
- Admin – Database Backups: Backing up databases manually and automatically.
- Admin – Database Upgrades: Upgrading a database.
- Admin – Database Version Control: Technical information on versions in BOS.
- Admin – Databases: Managing and creating databases and user access.
- Admin – Mobile App: Mobile app management and user access.
- Admin – Users: User management in BOS Tools.