Ledger Transaction Tutorials
How to Record a Bad Debt
- Navigate to a Customer Journal.
- Click New (button).
- Customer = Select the applicable customer.
- Items = Click Custom (button) next to Add.
- On the line item that was created, fill in the details as follows:
- Description = Balance written off.
- Dr Account = Bad Debts.
- Cr Account = Customer’s Account.
- VAT Category = Input +.
- Note: If the Customer’s outstanding balance does not include VAT, The VAT Category = N/A.
- VAT Type = Bad Debts.
- Note: Certain countries (e.g. South Africa) require bad debts to be shown on the VAT Return separately from other input claims. If your country does not require that, you do not need to create a VAT Type for bad debts, you can use the standard-rated VAT Type.
- Inc = Checked.
- Amount = Type the amount as per the customer’s account that you are writing off.
- Change the transaction’s Status to Complete (on the colour-coded status bar).
- Click Save (button).
How to Record Discount Allowed
- This journal entry is used to record a settlement or ad-hoc discount (e.g. the customer short paid a small amount). This discount is shown as Discount Allowed on the Statement of Profit or Loss.
- Trade discounts are normally reflected on the invoice or recorded using credit notes and are not shown separately (the applicable revenue account is debited).
- Navigate to the Customer Journal.
- Click New (button).
- Customer = Select the applicable customer.
- Items = Click Custom (button) next to Add.
- On the line item that was created, fill in the details as follows:
- Description = Discount Allowed.
- Dr Account = Discount Allowed.
- Cr Account = Customer’s Account.
- VAT Category = Input +.
- Note: If the customer’s outstanding balance does not include VAT, VAT Category = N/A (e.g. if you charged the customer interest and you are writing off that interest).
- Note: The VAT Category is correct for the expense account Discount Allowed. If you are debiting a sales account instead of an expense account, the VAT Category is Output – because it reduces your revenue.
- VAT Type = Standard VAT.
- Inc = Checked.
- Amount = Type the amount as per the customer’s account that you are writing off as discount.
- Change the transaction’s Status to Complete (on the colour-coded status bar).
- Click Save (button).
How to Record Discount Received
- This journal entry is used to record a settlement or ad-hoc discount (e.g. there is a small balance on the supplier’s account which you are writing off).
- Trade discounts are normally reflected on the invoice or recorded using debit notes.
- Navigate to the Supplier Journal.
- Click New (button).
- Supplier = Select the applicable supplier.
- Items = Click Custom (button) next to Add.
- On the line item that was created, fill in the details as follows:
- Description = Discount Received.
- Dr Account = Supplier’s Account.
- Cr Account = Discount Received.
- VAT Category = Output +.
- Note: If the supplier’s outstanding balance does not include VAT, VAT Category = N/A (e.g. if the supplier is not registered for VAT).
- VAT Type = Standard VAT.
- Inc = Checked.
- Amount = Type the amount as per the supplier’s account that you are writing off as discount.
- Change the transaction’s Status to Complete (on the colour-coded status bar).
- Click Save (button).
How to Record Foreign Exchange Payments
- If you have a bank account in the foreign currency these steps are unnecessary because the balance due on the supplier account will match the payment.
- If, however, you pay a supplier in a currency that does not match your bank account’s currency; you can capture the transactions using this example.
- Create a Current Liability account named Forex Control (if the account does not exist on your chart of accounts).
- Create an expense account named Forex Gains or Losses (if the account does not exist on your chart of accounts).
- Navigate to the Supplier Journal.
- Click New (button).
- Date = The date of the payment.
- Supplier = Select the applicable supplier.
- Items = click Custom (button) next to Add.
- On the line item that was created, fill in the details as follows:
- Description = Forex Payment.
- Dr Account = Supplier Account.
- Cr Account = Forex Control.
- VAT Category = N/A.
- VAT Type = No VAT.
- Inc = Checked.
- Amount = Type the amount that the supplier has paid in the foreign currency.
- Change the transaction’s Status to Complete (on the colour-coded status bar).
- Click Save (button).
- Navigate to Bank Payments – General.
- Click New (button).
- Date = The date of the payment.
- Reference = Type a reference (e.g. AWS Payment).
- Items = Click Custom (button) next to Add.
- On the line item that was created, fill in the details as follows:
- Description = Forex Payment.
- Dr Account = Forex Control.
- Cr Account = Bank.
- VAT Category = N/A.
- VAT Type = No VAT.
- Inc = Checked.
- Amount = Type the amount that was deducted from your bank account for the forex payment.
- Change the transaction’s Status to Complete (on the colour-coded status bar).
- Click Save (button).
- Navigate to the Ledger.
- Click Detailed Ledger (radio button).
- Select Forex Control from the dropdown list directly below Detailed Ledger (radio button).
- Select the Date (e.g. This Month).
- Click View (button).
- Write down the balance on the account and whether it is a debit or credit balance.
- Navigate to the General Journal.
- Click New (button).
- Date = Today’s date.
- If there was a debit balance on the Forex Control account, follow this procedure:
- Reference = Forex Loss.
- Items = Click Custom (button) next to Add.
- On the line item that was created, fill in the details as follows:
- Description = Forex Loss.
- Dr Account = Forex Gains or Losses (Expense Account).
- Cr Account = Forex Control.
- Note: The account had a debit balance; therefore, it is credited to bring the balance to zero.
- VAT Category = N/A.
- VAT Type = No VAT.
- Inc = Checked.
- Amount = Type the balance that was on the Forex Control account.
- If there was a credit balance on the Forex Control account, follow this procedure:
- Reference = Forex Gain.
- Items = Click Custom (button) next to Add.
- On the line item that was created, fill in the details as follows:
- Description = Forex Gain.
- Dr Account = Forex Control.
- Note: The account had a credit balance; therefore, it is debited to bring the balance to zero.
- Cr Account = Forex Gains or Losses (Expense Account).
- VAT Category = N/A.
- VAT Type = No VAT.
- Inc = Checked.
- Amount = Type the balance that was on the Forex Control account.
- Change the transaction’s Status to Complete (on the colour-coded status bar).
- Click Save (button).
- Navigate to the Ledger.
- Click Detailed Ledger (radio button).
- Select Forex Control from the dropdown list directly below Detailed Ledger (radio button).
- Select the Date (e.g. This Month).
- Click View (button).
- The balance on the account should be zero.
How to Record Foreign Exchange Receipts
- If you have a bank account in the foreign currency these steps are unnecessary because the balance due on the customer account will match the payment received from the customer.
- If, however, you have a customer who pays foreign currency into your local bank account, you can use this example to record any foreign exchange gain or loss.
- Create a Current Liability account named Forex Control (if the account does not exist on your chart of accounts).
- Create an expense account named Forex Gains or Losses (if the account does not exist on your chart of accounts).
- Navigate to a Customer Journal.
- Click New (button).
- Date = The date of the payment.
- Customer = Select the applicable customer.
- Items = Click Custom (button) next to Add.
- On the line item that was created, fill in the details as follows:
- Description = Forex Payment.
- Dr Account = Forex Control.
- Cr Account = Customer Account.
- VAT Category = N/A.
- VAT Type = No VAT.
- Inc = Checked.
- Amount = Type the amount that the customer has paid in the foreign currency.
- Change the transaction’s Status to Complete (on the colour-coded status bar).
- Click Save (button).
- Navigate to Bank Receipts – General.
- Click New (button).
- Date =The date of the payment.
- Reference = Customer Payment.
- Items = Click Custom (button) next to Add.
- On the line item that was created, fill in the details as follows:
- Description = Forex Payment.
- Dr Account = Bank.
- Cr Account = Forex Control.
- VAT Category = N/A.
- VAT Type = No VAT.
- Inc = Checked.
- Amount = Type the amount that was received in your bank account (the converted amount).
- Change the transaction’s Status to Complete (on the colour-coded status bar).
- Click Save (button).
- Navigate to the Ledger.
- Click Detailed Ledger (radio button).
- Select Forex Control from the dropdown list directly below Detailed Ledger (radio button).
- Select the Date (e.g. This Month).
- Click View (button).
- Write down the balance on the account and whether it is a debit or credit balance.
- Navigate to the General Journal
- Click New (button).
- Date = Today’s date.
- If there was a debit balance on the Forex Control account, follow this procedure:
- Reference = Forex Loss.
- Items = Click Custom (button) next to Add.
- On the line item that was created, fill in the details as follows:
- Description = Forex Loss.
- Dr Account = Forex Gains or Losses (Expense Account).
- Cr Account = Forex Control.
- Note: The account had a debit balance; therefore, it is credited to bring the balance to zero.
- VAT Category = N/A.
- VAT Type = No VAT.
- Inc = Checked.
- Amount = Type the balance that was on the Forex Control account.
- If there was a credit balance on the Forex Control account, follow this procedure:
- Reference = Forex Gain.
- Items = click Custom (button) next to Add.
- On the line item that was created, fill in the details as follows:
- Description = Forex Gain.
- Dr Account = Forex Control.
- Note: The account had a credit balance; therefore, it is debited to bring the balance to zero.
- Cr Account = Forex Gains or Losses (Expense Account).
- VAT Category = N/A.
- VAT Type = No VAT.
- Inc = Checked.
- Amount = Type the balance that was on the Forex Control account.
- Change the transaction’s Status to Complete (on the colour-coded status bar).
- Click Save (button).
- Navigate to the Ledger.
- Click Detailed Ledger (radio button).
- Select Forex Control from the dropdown list directly below Detailed Ledger (radio button).
- Select the Date (e.g. This Month).
- Click View (button).
- The balance on the account should be zero.
How to Record a Loan or Hire Purchase Agreement
- For this example, we purchased a truck from Hyundai Motors and were charged VAT that we are allowed to claim back. The charges also included VAT (e.g. contract fees).
- The transaction consists of four steps:
- General Journal: Record the VAT Exclusive cost price of the motor vehicle and the principal loan amount.
- General Journal: Record the interest that is payable on the loan.
- General Journal: Record any charges (e.g. lease fee) that are included in the loan.
- Bank Payment: Record any deposit paid.
- Navigate to the General Journal.
- Click New (button).
- Items = Click Custom (button) next to Add.
- On the line item that was created, fill in the details as follows:
- Description = Truck Purchased: Hyundai Motors.
- Dr Account = Motor Vehicles @ Cost (fixed asset account).
- Cr Account = Hire Purchase: Motor Vehicles (long-term liability).
- VAT Category = Input +.
- VAT Type = Capital Goods.
- Note: In certain countries (e.g. South Africa) the VAT claimed for purchases of capital goods must be shown separately on the VAT Return. If your country does not require that, you do not need to create a VAT Type for capital goods, you can use the VAT type for your standard rate.
- Inc = Checked.
- Amount = Type the VAT Inclusive purchase amount.
- Items = Click Custom (button) next to Add.
- Description = Truck Purchased: Hyundai Motors.
- Dr Account = Deferred Finance Charges (current asset account).
- Cr Account = Hire Purchase: Motor Vehicles (long-term liability).
- VAT Category = N/A.
- VAT Type = No VAT.
- Inc = Checked / Unchecked (it makes no difference because there is no VAT).
- Amount = Type the amount of finance charges that is due over the life of the agreement.
- Items = Click Custom (button) next to Add.
- Description = Truck Purchased: Hyundai Motors.
- Dr Account = Bank Charges (expense account).
- Cr Account = Hire Purchase: Motor Vehicles (long-term liability).
- VAT Category = Input+.
- VAT Type = Standard.
- Inc = Checked.
- Amount = Type the VAT inclusive amount of charges (e.g. loan agreement fee / contract fee) on the agreement.
- Change the transaction’s Status to Complete (on the colour-coded status bar).
- Click Save (button).
- Navigate to Bank Payments.
- Click New (button).
- Items = Click Custom (button) next to Add.
- On the line item that was created, fill in the details as follows:
- Description = Truck Purchased: Hyundai Motors – deposit.
- Dr Account = Hire Purchase: Motor Vehicles (long-term liability).
- Cr Account = Bank (current asset).
- VAT Category = N/A
- VAT Type = No VAT.
- Note: VAT was already claimed in full on the journal entry.
- Inc = Checked.
- Amount = Type the deposit amount as per your bank account.
How to Record Periodic Inventory Journals
- This journal is only necessary if you post all the purchases to an accrual account. The purpose of this journal is to clear the accrual account, record the increase or decrease in stock on hand, and to correctly record the cost of sales.
- This process consists of two parts:
- Collecting the information.
- Recording the information.
- Please check that there are no pending transactions for the period you are creating this journal for. If there are, change their dates to the next period, or wait until they are completed.
The table below illustrates the transaction flow that this journal is based on.
| Transaction | Process | Inventory Transaction | Effect on Stock on Hand | Dr Account | Cr Account | Total |
|---|---|---|---|---|---|---|
| Supplier Invoice | Purchase raw materials | Goods Received | Raw Materials + | Inventory Accrual | Supplier | A |
| Supplier Invoice | Purchase finished goods for an order | n/a | n/a | Cost of Sales | Supplier | |
| Supplier Invoice | Outsource work to the supplier | n/a | n/a | Cost of Sales | Supplier | |
| Supplier Debit Note | Return raw materials | Goods Issued | Raw Materials – | Supplier | Inventory Accrual | B |
| Supplier Debit Note | Return finished goods | n/a | n/a | Supplier | Cost of Sales | |
| Supplier Debit Note | Return / credit outsource | n/a | n/a | Supplier | Cost of Sales | |
| Work Order | Issue Raw Materials | Goods Issued | Raw Materials – | B | ||
| Work Order | Goods Complete | Goods Received | Finished Goods + | A | ||
| Work Order | Returns unused raw materials | Goods Received | Raw Materials + | A | ||
| Customer Invoice | Deliver products | Goods Issued | Finished Goods – | B | ||
| Customer Credit Note | Returns Goods that can be resold | Goods Returned | Finished Goods + | C | ||
| Customer Credit Note | Returns Goods that are discarded | n/a | n/a |
Collect the information
1. Find the amount added to Stock on Hand:
- Navigate to Goods Received List View.
- Select This month next to Set.
- Use the arrows next to This Month to navigate to the previous month if applicable.
- Record the VAT exclusive total of Goods Received for the period. Amount A.
- Repeat this step if you have more than one Goods Received Transaction Type.
2. Find the amount taken from Stock on Hand:
- Navigate to Goods Issued List View
- Select This month next to Set.
- Use the arrows next to This Month to navigate to the previous month if applicable.
- Record the VAT exclusive total of Goods Issued for the period. Amount B
3. Find the amount added back to Stock on Hand:
- Navigate to Goods Returned List View.
- Select This month next to Set.
- Use the arrows next to This Month to navigate to the previous month if applicable.
- Record the VAT exclusive total of Goods Received for the period. Amount C
Record the transactions:
- Navigate to Periodic Journals.
- Click New (button).
- Date = Last day of the applicable month.
- Reference = Month End Stock Journal.
- Items = Click Custom next to Add.
- On the line item that was created, fill in the details as follows:
- Description = Month-end Inventory Journal.
- Dr Account = Stock on Hand.
- Cr Account = Accruals (Purchases and Inventory).
- VAT Category = N/A.
- VAT Type = No VAT.
- Inc = Checked / Unchecked.
- Amount = Type Amount A (80 000 in the table below).
- Items = Click Custom next to Add.
- On the line item that was created, fill in the details as follows:
- Description = Month-end Inventory Journal.
- Dr Account = Cost of Sales.
- Cr Account = Stock on Hand.
- VAT Category = N/A.
- VAT Type = No VAT.
- Inc = Checked / Unchecked.
- Amount = Type Amount B (125 000 in the table below)
- Items = Click Custom next to Add.
- On the line item that was created, fill in the details as follows:
- Description = Month-end Inventory Journal.
- Dr Account = Stock on Hand.
- Cr Account = Accruals (Purchases and Inventory).
- VAT Category = N/A.
- VAT Type = No VAT.
- Inc = Checked / Unchecked.
- Amount = Type Amount C. (10 000 in the table below).
- Change the transaction’s Status to Complete (on the colour-coded status bar).
- Click Save (button).
The accounts should look like this (using the example amounts):
| Debit | Credit | |
|---|---|---|
| Accrual Account | ||
| Opening Balance | 90 000.00 | |
| Entry 6 (Amount A) | 80 000.00 | |
| Entry 10 (Amount C) | 10 000.00 | |
| Closing Balance: Must be zero. | 0.00 | 0.00 |
| Stock on Hand | ||
| Opening Balance | 75 000.00 | |
| Entry 6 (Amount A) Goods Received | 80 000.00 | |
| Enty 8 (Amount B) Goods Issued | 125 000.00 | |
| Entry 10 (Amount C) Goods Returned | 10 000.00 | |
| Closing Balance: Should ideally match the Inventory Summary | 45 000.00 | |
| Cost of Sales (Movement for the month) | ||
| Entry 8 (Amount B) Goods Issued | 125 000.000 | |
How to Record Payroll Journals
- This process assumes that you have separate payroll software and you are given a summary sheet to record in QuickEasy BOS.
- A Payroll Accrual account is used. When all the entries have been made, the balance on this account should be zero.
Example summary:
| Description | Expenses | Liabilities | Amount |
|---|---|---|---|
| Cost to Company | |||
| Wages (Direct Labour) | 45 000 | A | |
| Admin Salaries | 28 000 | B | |
| Directors Salaries | 83 000 | C | |
| Operations Salaries | 120 000 | D | |
| Deducted from Wages / Salaries | |||
| Taxes Withheld | 23 000 | E | |
| Staff Contributions: Insurance (e.g. UIF) | 1 050 | F | |
| Staff Contributions: Pension / Medical Aid | 18 000 | G | |
| Staff Payments Due | 233 950 | J | |
| 276 000 | 276 000 | ||
| Company Contributions: Pension / Medical Aid | 18 000 | H | |
| Company Contributions: Insurance (e.g. UIF) | 1 050 | I | |
Journal Entry
- Navigate to Payroll Journals.
- Click New (button).
- Date = Last day of the applicable month. (e.g. 30 June).
- Reference = Payroll Journal.
- Items = Click Custom next to Add 9 times.
- Fill in each line as per the table below.
- Note: Because there is no VAT applicable to any of the entries, it does not matter if you check the Inc column or not.
- Change the transaction’s Status to Complete (on the colour-coded status bar).
- Click Save (button).
| Description | Dr Account | Cr Account | Amount |
|---|---|---|---|
| Payroll (e.g. June Payroll) | COS: Direct Labour (Cost of Sales) | Payroll Control > Staff Payments (Current Liability) | A |
| Payroll (e.g. June Payroll) | Salaries: Admin (Expense) | Payroll Control > Staff Payments (Current Liability) | B |
| Payroll (e.g. June Payroll) | Salaries: Directors (Expense) | Payroll Control > Staff Payments (Current Liability) | C |
| Payroll (e.g. June Payroll) | Salaries: Operations (Expense) | Payroll Control > Staff Payments (Current Liability) | D |
| Payroll (e.g. June Payroll) | Payroll Control > Taxes Due (Current Liability) | Payroll Taxes Due (Current Liability) | E |
| Payroll (e.g. June Payroll) | Payroll Control > Insurance Due (Current Liability) | Insurances Due (Current Liability) | F |
| Payroll (e.g. June Payroll) | Payroll Control > Pension & Medical Due (Current Liability) | Pension / Medical Due (Current Liability) | G |
| Payroll (e.g. June Payroll) | Pension / Medical (Expense) | Payroll Control > Pension / Medical Due (Current Liability) | H |
| Payroll (e.g. June Payroll) | Staff Insurances (Expense) | Payroll Control > Insurances Due (Current Liability) | I |
Bank Payments
- Most likely these payments will be recorded as four separate entries on different dates.
- All the current liability accounts should have zero balances after the bank payments have been made.
- If individual staff payments are entered there will be multiple entries for the first line on the table, not just one. However, all the staff payments added up should equal Amount J.
- If the accounts do not balance, check if there were other deductions such as staff loans, or advances.
- Navigate to Bank Payments.
- Click New (button).
- Date = Last day of the applicable month. (e.g. 30 June).
- Reference = Payroll.
- Items = Click Custom.
- Fill in each line as per the table below.
- Note: Because there is no VAT applicable to any of the entries, it does not matter if you check the Inc column or not.
- Change the transaction’s Status to Complete (on the colour-coded status bar).
- Click Save (button).
| Description | Dr Account | Cr Account | Amount |
|---|---|---|---|
| Staff Payments | Payroll Accrual | Bank | J |
| Insurance Payment | Insurances Due | Bank | F + I |
| Medical / Pension | Pension / Medical Due | Bank | G + H |
| Payroll Taxes | Payroll Taxes Due | Bank | E |
How to Record Foreign Exchange Gains or Losses
- These transactions are only necessary if you want to clear outstanding amounts that only show in the local currency on the age analysis and ledger.
- For example, an invoice was issued and paid in full in the foreign currency. However, when viewing the age analysis in the local currency, there may be an outstanding amount because of currency fluctuations.
- To remove the account from the age analysis it is necessary to record a local forex gain or loss transaction.
- The transaction types below must only use the local currency but because that is the default for the setting, the currency setting is not added.
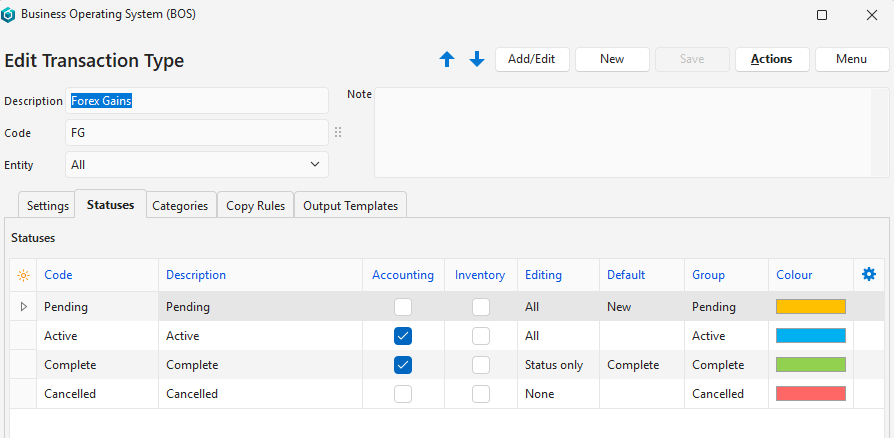
Step 1: Create Transaction Types (if they do not already exist)
- Create four Transaction Types as follows:
- Forex Gains – Customers
- Forex Losses – Customers
- Forex Gains – Suppliers
- Forex Losses – Suppliers
- Add the following settings to each transaction type, and set the values as specified:
| Setting | Forex Gains Customers | Forex Losses Customers | Forex Gains Suppliers | Forex Losses Suppliers |
|---|---|---|---|---|
| Accounting > Credit Type | Ledger | Customer | Ledger | Supplier |
| Accounting > Debit Type | Customer | Ledger | Supplier | Ledger |
| Accounting > Default Credit Account | Forex Gains / Losses | – | Forex Gains / Losses | – |
| Accounting > Default Debit Account | – | Forex Gains / Losses | – | Forex Gains / Losses |
| Accounting > Enable Accounting | Checked | Checked | Checked | Checked |
| Accounting > Pricing | Accounting | Accounting | Accounting | Accounting |
3. Accept the default Statuses (using the Active status is optional) and check the checkbox in the Accounting column for the Active (optional) and Complete statuses.
4. Set user access.
5. Add the transaction types to a menu.
Create the Transactions
- Because the transaction type only uses the local currency, the transaction only affects the customer or supplier’s account when viewed in the local currency.
- If you did not write down the amount that must be written off, type any amount and when allocating the transaction choose Allocate (button) > Allocate and Update Transaction Total (Step 9). The amount you typed will be changed to the outstanding amount.
- Open the applicable transaction type (e.g. Forex Gains – Customer).
- Click New (button).
- Complete the details as follows:
- Reference = Forex Adjustment.
- Select the applicable Customer or Supplier in the Dr Account or Cr Account columns, whichever is applicable.
- Type the outstanding amount in the Amount column.
- Click Allocation (button).
- Click the applicable entry in the Outstanding section.
- Click Allocate (button) > Allocate by Outstanding.
- Close the Allocate popup.
- Click Done (button).