Non-Conformance Reports (NCRs)
An NCR is a formal document used to record, investigate, and correct a situation where something does not meet the required standards.
Those standards could be:
- Company procedures,
- Contract requirements,
- Industry standards such as ISO,
- Regulatory or legal requirements,
- Design specifications.
An NCR is raised when:
- A product is defective,
- A process is not followed correctly,
- The output does not meet the drawings or specifications,
- Safety or compliance requirements are violated,
- Audit findings reveal non-compliance with internal procedures.
An NCR usually includes:
- Description of the non-conformance,
- Reference to the violated standard or requirement,
- Root cause analysis (why it happened),
- Corrective action (how it will be fixed),
- Preventive action (how it will be avoided in the future),
- Responsible person and deadlines,
- Verification and closure approval.
NCRs are issued to:
- Ensure quality and compliance,
- Prevent repeat issues,
- Improve processes,
- Provide traceability and accountability.
Examples
- A construction project uses the wrong grade of concrete → NCR issued.
- A factory produces parts outside tolerance → NCR issued.
- An ISO audit finds missing documentation → NCR issued.
NCRs in QuickEasy BOS
QuickEasy BOS expertly manages NCRs using transactions and the service manager.
Transactions
- NCRs can be activated for transactions by checking the box next to the Transaction Type Setting: General > Enable NCR (Problem).
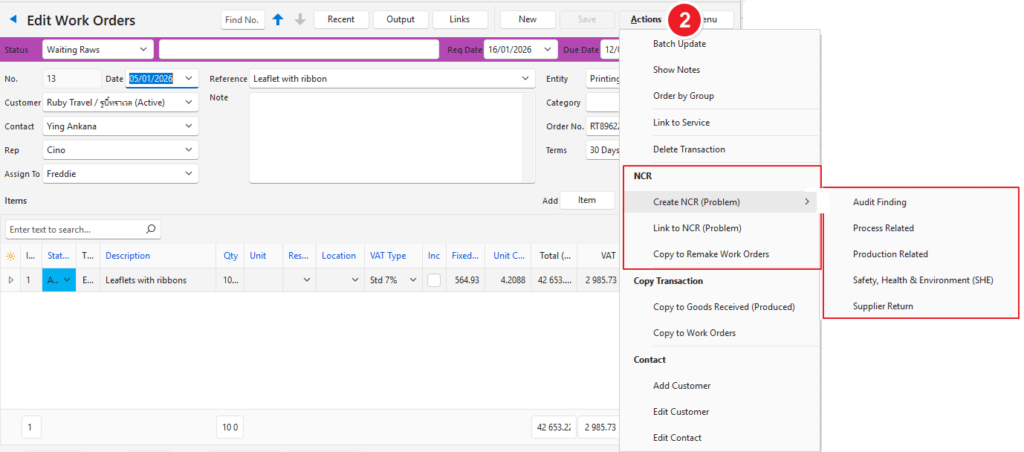
- Activating this setting exposes additional options when the Actions button is clicked from within the applicable transaction.
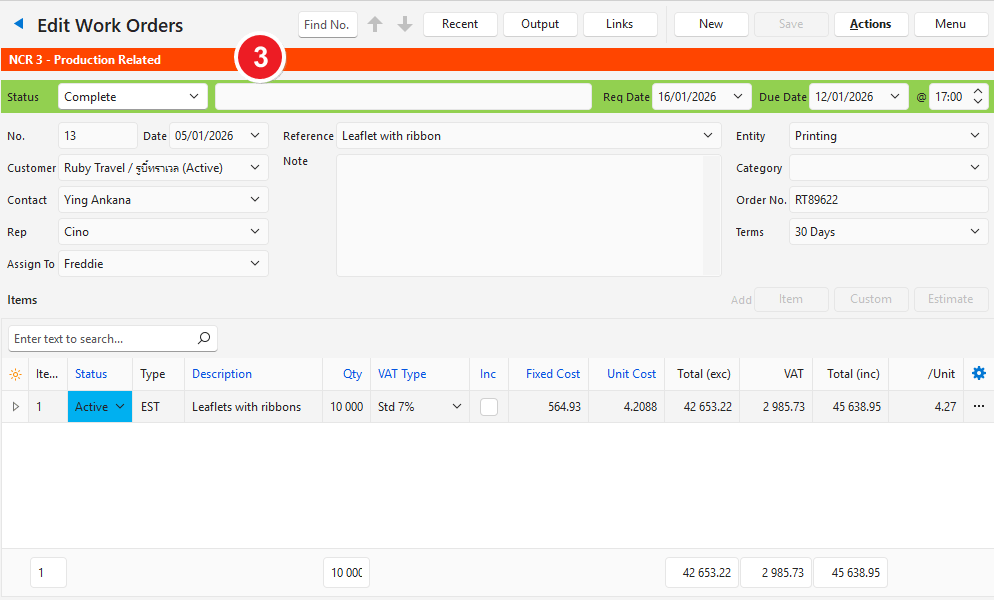
- Once a transaction has been marked as non-conformance, an orange banner is displayed on the transaction with the applicable NCR service ticket’s number.
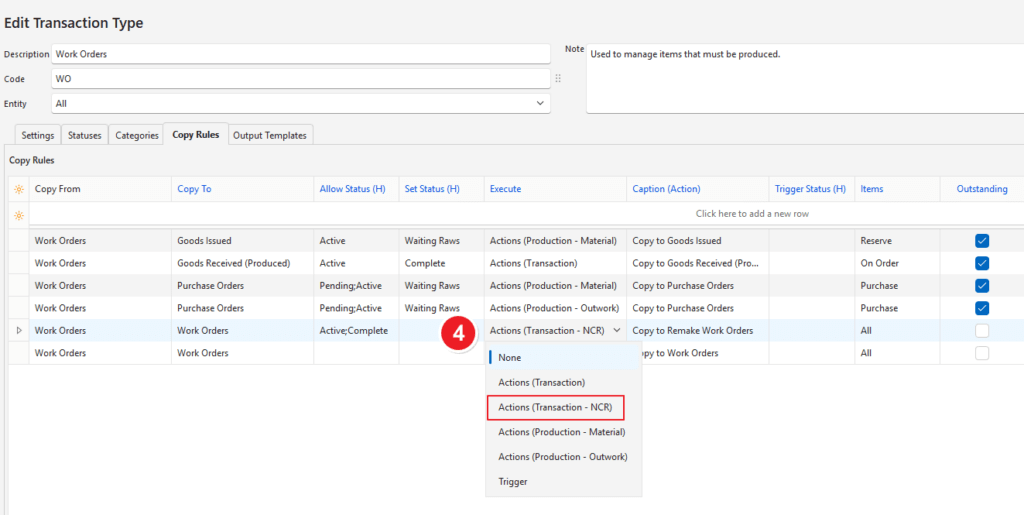
- Copy Rules can be created to copy the transaction to a specific NCR transaction. A function is included under Execute to identify the transaction as an NCR transaction.
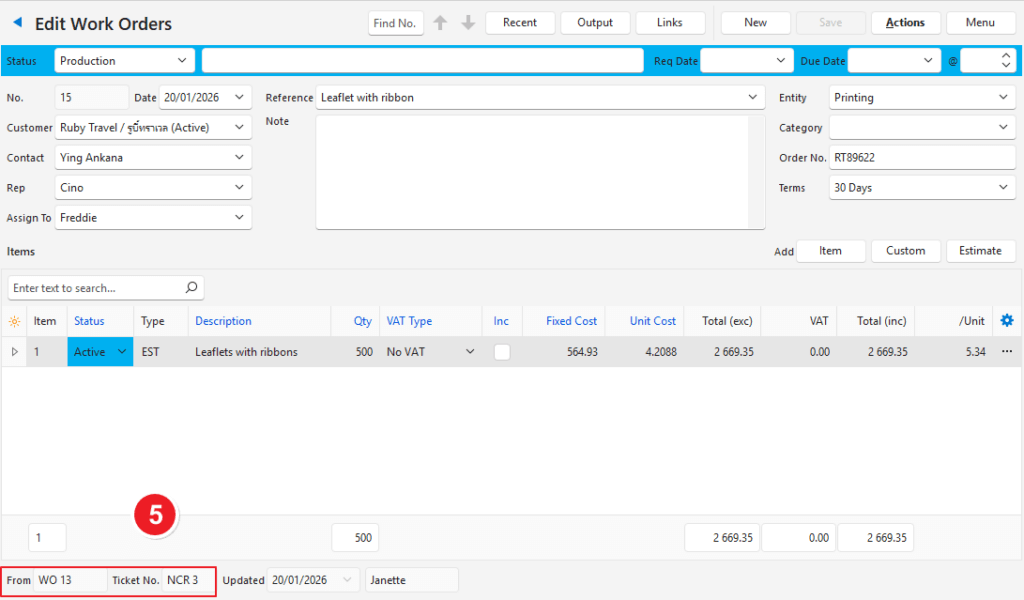
- When a transaction is copied to a remake transaction, information is displayed in the transaction’s footer. The Links button includes links to the ticket and other transactions in the same transaction flow.

Service Types
- A dedicated Service Type should be created for NCRs and added to an appropriate menu.
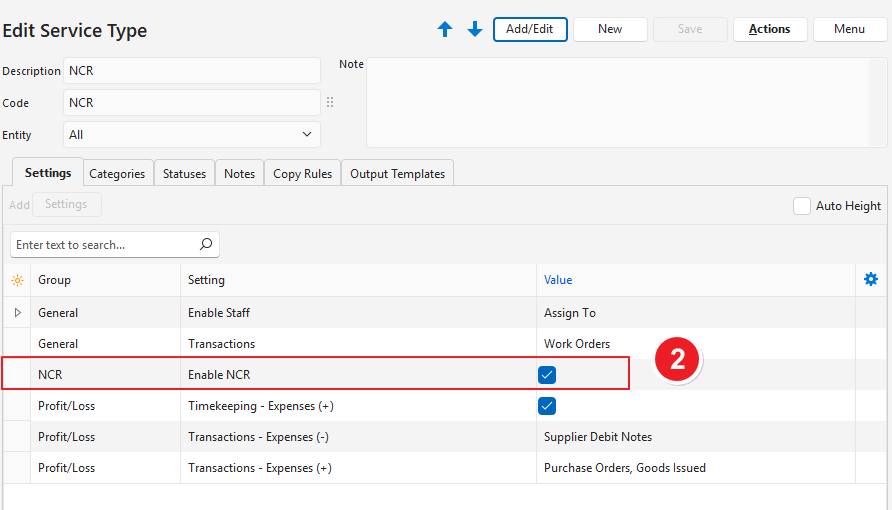
- The Service Type is identified as the one used for NCRs by adding the setting NCR > Enable NCR and checking the checkbox. This setting may be added to multiple service types.
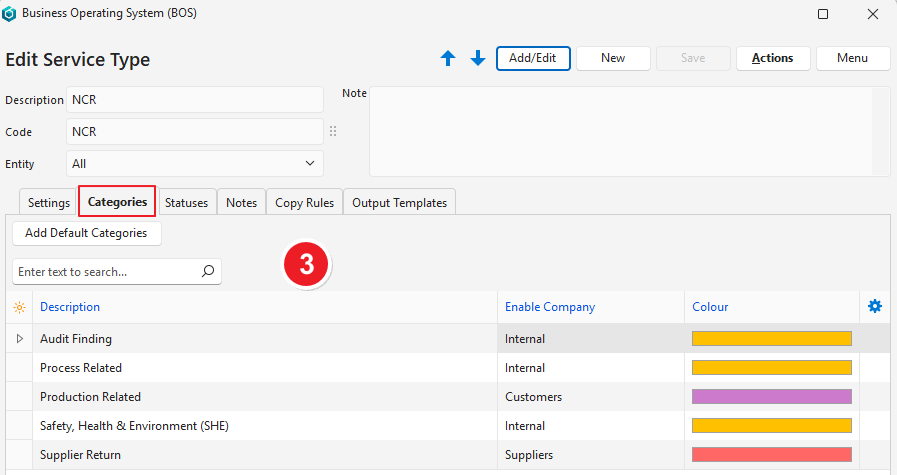
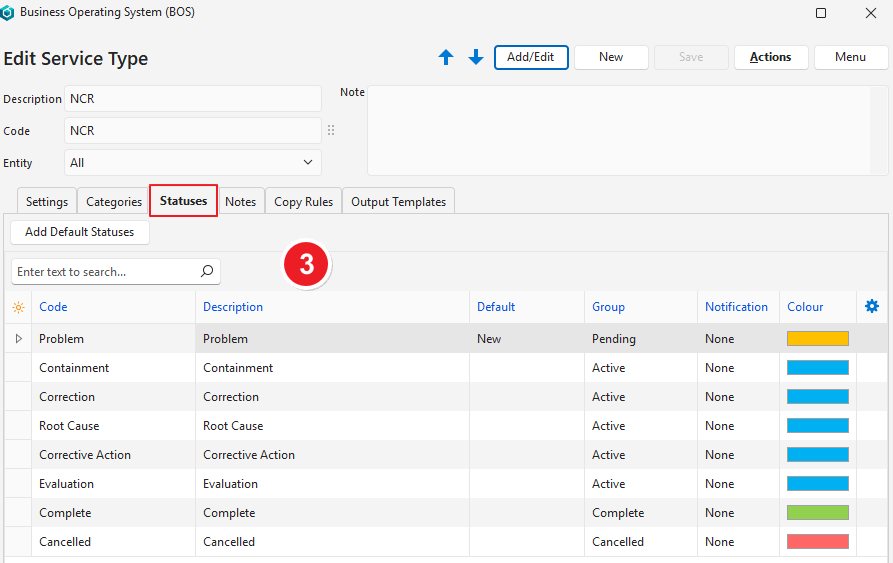
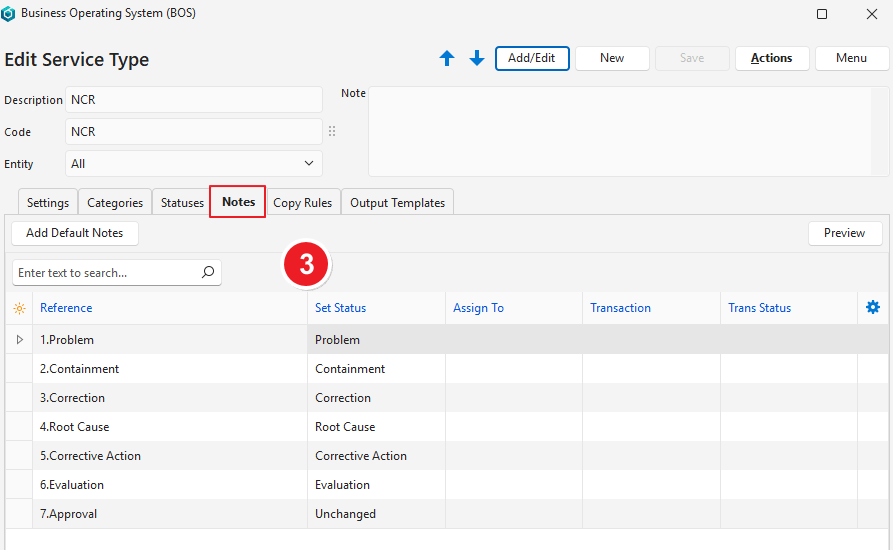
- Default Categories, Statuses, and Notes for NCRs can be selected when creating the service type.
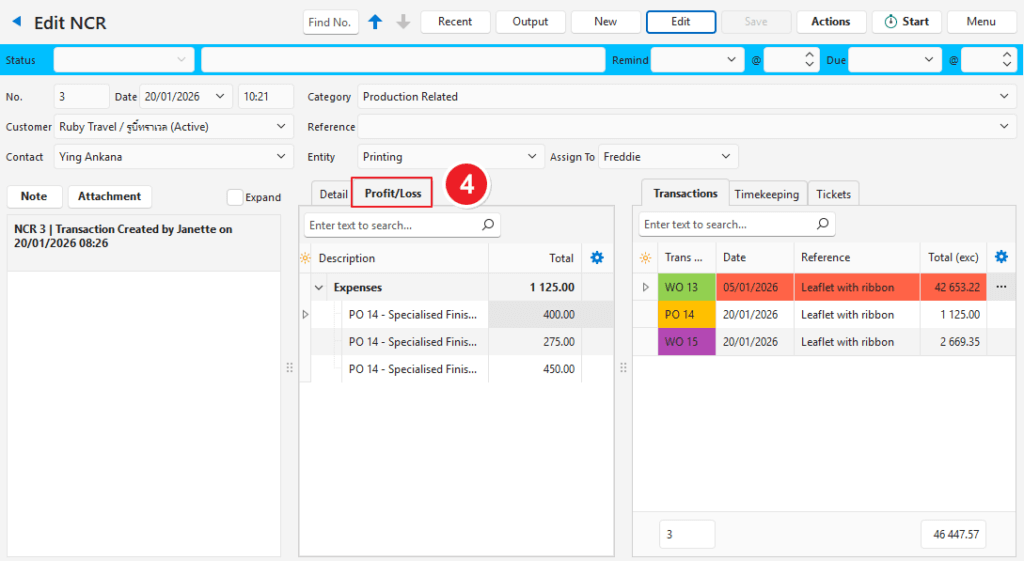
- The related transactions and timekeeping records can be identified to track the costs associated with the NCR (See Screenshot 2 Profit/Loss below). If set up, a profit and loss statement is shown on the ticket.
Tutorials
How to Create and Resolve an NCR Ticket
- This example is based on a product that is produced from a work order.
- The notes on the service ticket should be added in sequence.
- Although these instructions list the steps one after the other, the steps might be completed by different people on different days.
- Production should be complete before the ticket is closed so that all the costs are included.
- Step 8 (creating the additional work order) can be executed at any stage.
- Navigate to the transaction on which the error is (e.g. a Work Order).
- Click Actions (button) > Create NCR (Problem) and select one of these options:
- Audit Finding
- Process Related
- Production Related
- Safety, Health & Environment (SHE)
- Supplier Return
- If confirmed, a service ticket is created and opened.
- On the service ticket, the linked transaction is shown on the Transactions tab, highlighted in orange.
- Click Note (button) and click 1. Problem.
- Describe the problem in the note section.
- Assign To: Select the user who must work on the issue next.
- Click Save (button).
- Click Note (button) and click 2. Containment.
- Describe what was / will be done to contain the problem in the note section.
- Assign To: Select the user who must work on the issue next.
- Click Save (button).
- Click Note (button) and click 3. Correction.
- Describe what was / will be done to correct the problem in the note section.
- Assign To: Select the user who must work on the issue next.
- Click Save (button).
- On the service ticket, on the Transactions (tab), right click the transaction that is marked in orange and click Open Transaction. When the transaction is opened:
- Click Actions (button) > Copy to Remake Work Orders.
- On the popup, uncheck any items that must not be copied.
- Check that there is a checkmark next to Open New Transaction (bottom left).
- Click Copy (button).
- On the newly created work order edit the Qty column to indicate how many replacement products must be produced.
- Place the work order into production (if linked) so that the tasks, materials, and outwork can be processed.
- Navigate back to the Service Ticket: From the transaction, click Links (button) > and click the service ticket’s number (e.g. NCR 3).
- Click Actions (button) > Copy to Remake Work Orders.
- Click Note (button) and click 4. Root Cause.
- Describe what the root cause of the problem was in the note section.
- Assign To: Select the user who must work on the issue next.
- Click Save (button).
- Click Note (button) and click 5. Corrective Action.
- Describe what corrective action was / will be taken in the note section.
- Assign To: Select the user who must work on the issue next.
- Click Save (button).
- Click Note (button) and click 6. Evaluation.
- Type an evaluation of the issue in the note section.
- Assign To: Select the user who must approve the ticket.
- Click Save (button).
- Click Note (button) and click 7. Approval.
- Type any note in the block provided (optional).
- Click Complete under Set Status.
- Click Save (button).
How to Unlink a Ticket from an NCR Transaction
- Open the applicable Service Ticket.
- Under the transactions, right click the transaction that the ticket is linked to (the transaction is highlighted in orange) and click Unlink Transaction NCR.
- Confirm that the ticket should be unlinked.