Menus Explained
- Menus are graphical user interface (GUI) elements that allow users to access various features and functions of an application by clicking a button (menu option).
- The Menus in QuickEasy BOS can be customised by creating Menu Groups and linking components (modules) to these groups.
- Menu Groups and Fixed Menu Items are included in Menu Templates which are assigned to users.
Navigation: Main Menu > Setup > Menus

Main Menu
- This is the main menu of the software which consists of a row of text buttons placed at the top of the window.
- This documentation refers to it as the Main Menu.
- The menu can be customised (i.e. your menu will not look like the screenshot).
Tile Menu
- This is the Home menu and provides links to frequently used modules and categories as chosen by users.
- The menu can be customised.
Button Bar
- Modules contain navigational elements, search functions, and menus on the top right.
- The menu options and functions vary between modules.
Actions Button
- Most displays include an Actions button which includes functions to edit the records (e.g. Batch Updates).
- The Action items are specific to each module and differ between List View (reports) and Edit View (entering or editing a transaction).
Context Menus
- A Context Menu is a submenu that opens when an entry is right clicked.
- Context menus vary based on the modules and displays.
Panels
- Reports and actions can be opened on the left panel, right panel or on a popup window.
- Popup windows:
- Remain open on top of the workspace until closed. Closing them does not prompt a warning or confirmation, unlike closing a window that will close QuickEasy BOS.
- May be resized using standard Windows tools.
- Cannot be minimised because they supress the functions on the main window.
Workspace Navigation
- The Back navigational arrow, to the left of a heading, navigates to the previous screen.
- Pressing it from List View (a report) takes you back to the Menu screen.
- Pressing it from Edit View (a transaction) takes you back to List View.
- The Recent menu option shows a list of recently opened modules for quick navigation.
- The display includes the specific view where a module has multiple views.
- The list of recent items resets when QuickEasy BOS is closed.
How to Create Menus
Creating Menus is divided into two parts:
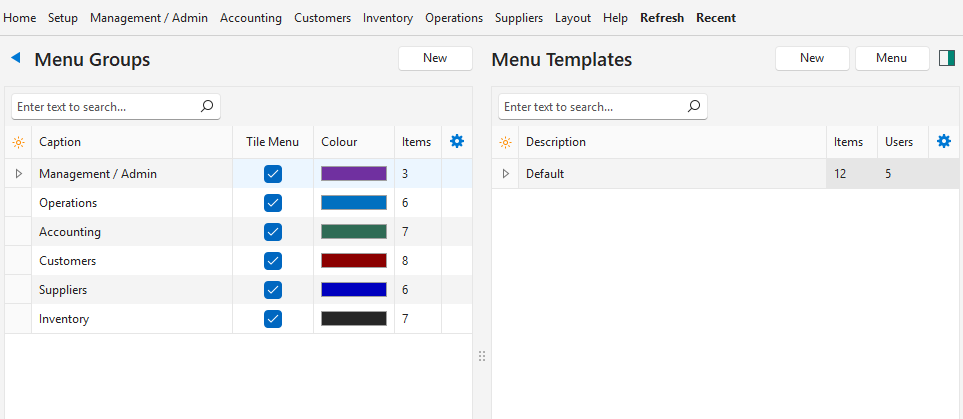
- Create Custom Menu Groups:
- A group is a main heading under which you want to place the individual menu items.
- You may create as many groups as you need. For example, you could create a single group for transactions and name it Workflow, or you could create four groups and name them Customer Transactions, Supplier Transactions, Inventory Transactions, and Accounting Transactions.
- Items may appear under multiple headings. For example, Contacts, Customers, and Suppliers are under Setup (a pre-created menu group), but you can also include them under any of the other headings you create.
- Create Menu Templates:
- Menu Templates consist of three parts:
- The Menu Groups you created as per Step 1.
- The Fixed Menu Groups that are pre-created (e.g. Setup, Help).
- The Fixed Menu Items that are standalone functions (e.g. Refresh, Recent).
- You may create as many Menu Templates as you want.
- Menu Templates are allocated to staff members. For example, a staff member who only captures supplier invoices and debit notes could be allocated a Menu Template that only contains those two transaction types, and the Fixed Menu Items.
- You can include menu items on the tile menu or leave them as a dropdown item on the top menu. (We recommend you include frequently used items on the tile menu and leave infrequently used items on the top menu.)
- Menu Templates consist of three parts: