Calendars and Transactions
- QuickEasy BOS helps organisations keep track of transaction items (e.g. tasks to be performed, goods to be made) and project deadlines using calendars.
- Calendars assist in managing resources such as labour, equipment, vehicles, and booking schedules.
- An organisation can have an unlimited number of calendars and customise the settings for each calendar by creating a Calendar Type.
- Once created, a Calendar can be added to any menu.
- User access is set for each calendar separately.
- Calendars can be integrated into Service Tickets to manage project and production tasks and Transactions at an item level.
How to Set Up Transaction Types to Use Calendars
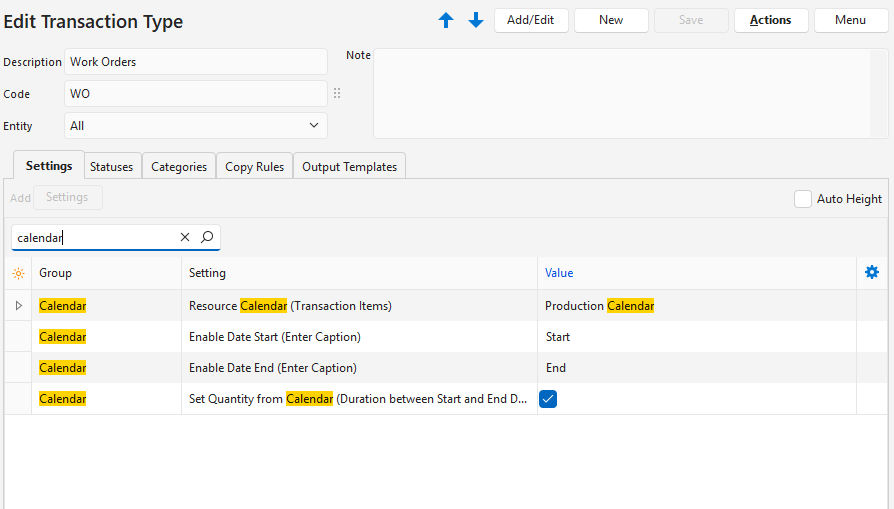
- Edit a Transaction Type.
- Add these settings:
- Calendar > Enable Date End (Enter Caption): Type a custom caption for the end date.
- Calendar > Enable Date Start (Enter Caption): Type a custom caption for the start date.
- Calendar > Resource Calendar (Transaction Items): Select a Calendar Type from the dropdown list.
- Calendar > Set Quantity from Calendar (Duration between Start and End Dates: Check the checkbox to adjust the quantity based on the start and end dates (optional). This feature works as follows:
- Update Start Date: The quantity is updated.
- Update End Date: The quantity is updated.
- Update Qty: The End Date is updated
How to Edit Transactions to Display on the Calendar
- The calendar works with the individual line items and not the due, required, or payment dates entered on the Status bar.
- All the calendar fields must be filled in before the entry is displayed on the calendar.
- Transactions cannot be edited from the calendar but can be opened from the calendar. Once opened, normal editing rules apply (e.g. the transaction must have a status that allows editing).
- Create or edit a transaction.
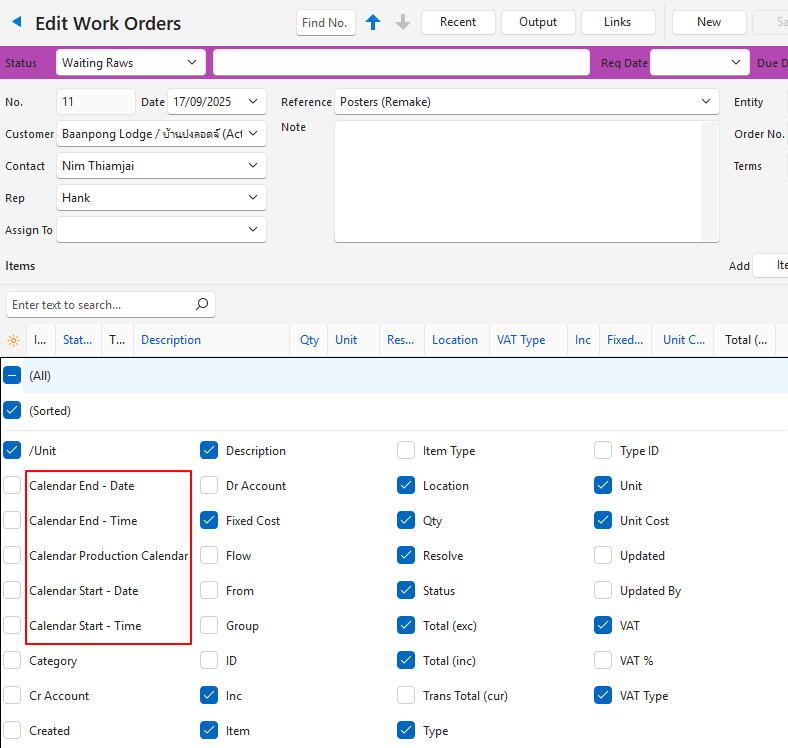
- Use the Field Chooser (*) in the first column and display these fields:
- Calendar End (where End is the caption typed in under How to Set Up Transaction Types to Use Calendars 2a).
- Time End
- Calendar Start (where Start is the caption typed in under How to Set Up Transaction Types to Use Calendars 2b).
- Time Start
- Transaction Calendar
- For every item complete these fields:
- Calendar Start = Select a start date on the calendar. This date must be sooner than the end date.
- Time Start = Select a start time.
- Calendar End = Select an end date on the calendar. This date must be later than the start date.
- Time End = Select an end time.
- Transaction Calendar = Select the contact or asset from the dropdown list (the resource that is performing the task).
How to Navigate to a Calendar from a Transaction
- Create or edit a transaction.
- Click Menu (button) > Open Calendar.
- Note: If the option is not there, calendars have not been correctly setup for that specific Transaction Type.
- The calendar is opened on the right-side panel.